Managing incoming delivery notes
Use Inventory management/Incoming delivery notes to register incoming delivery notes and view existing incoming delivery notes.
 |
When in the list: besides registering new incoming delivery notes, you can also view items using Open, and void items using Reverse vouchers. Product labels can be printed based on delivery notes.
Based on the delivery notes in the list, it is also possible to generate Incoming invoices. They can be opened from the Related vouchers tab.
The registration of similar and recurring vouchers can be accelerated based on already created delivery notes. Use the New by selected feature. Should your business management practices require so, for example cross-docking, administration can be facilitated by the possibility of creating outgoing invoices and delivery notes to partners based on items on a given incoming delivery note. Use the Create delivery note/Create invoice options at Create voucher.
The ususal list features (Filter, Update, List view settings, Print, Export list) are available too, either from the menu bar above the sheet or from the right-click menu.
 |
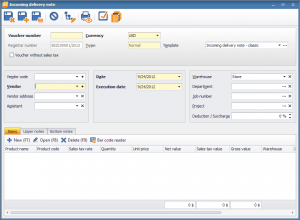
There is no need to specify a voucher pad when registering an incoming invoice. Besides specifying a Voucher number, you can also select the required currency in the Currency field. It is possible to select the partner and products. You can set the Execution date, the Warehouse, the Department, and the Job number. The voucher can also be associated with a Project. Use the Template field to select the applicable print template.
 |
When you finished creating the delivery note, click on the Save and close button to save the delivery note. The delivery note can be printed from the list of delivery notes.
If you click on the Save and print button, a confirmation window shows up. If necessary, use this window to modify the template, the number of copies, and the printer. You can also define if the voucher should be printed instantly.
When clicking on the Save and print button, the print parameterizing window shows up.
If you click on Save and new, everything happens as with Save and close. There is a difference though: the window does not close, and a new window opens. You can proceed with registering new delivery notes.
It is possible to exit by clicking on Cancel. You can also register delivery note groups, categories ( ). Use the Print preview option to view how the delivery note will look like.
If you want to define which fields should be mandatory, use the Mandatory fields option. Fields important to you will not be skipped, as the software will alert you that one/some of them are not filled out yet.


